6 DIY Fencing Wire Installation: A Step-by-Step Guide
Introduction
Are you looking to install fencing wire around your property but don't want to hire professionals to do it for you? With the right tools and a little bit of know-how, you can tackle this project on your own. In this step-by-step guide, we will walk you through the process of DIY fencing wire installation. By following these instructions carefully, you can save money and achieve a sense of accomplishment by completing the project yourself.
Step 1: Gather Your Materials
The first step in installing fencing wire is to gather all the necessary materials. You will need fencing wire, fence posts, a post hole digger, a hammer, wire cutters, staples, and a measuring tape. Make sure you have everything you need before you begin the installation process.
Step 2: Plan Your Fence Line
Before you start digging post holes, it's important to plan out your fence line. Use a measuring tape to determine the exact location where you want to install the fencing wire. Mark the spots where you will be placing the fence posts to ensure that your fence line is straight and even.
People Also Look For:
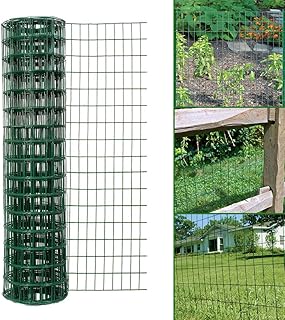
- Easipet PVC Coated Galvanised Steel Garden Fencing, Green, 120cm x 10m
- Tildenet 3070490 30m/ 2mm Plastic Coated Garden Wire Coil, Green
- Suregreen Galvanised Chicken Wire Mesh Roll Netting Hexagonal Holes Poultry Fencing | 900mm x 25m | 50mm Holes
- Stainless Steel Wire Rope 30m Garden Wire Fencing Wire Metal Wire 2mm Wire Rope Kit Garden Wire for Climbing Plants Picture Hangin...
- Suregreen PVC Coated Chicken Wire | 600mm x 10m | 50mm Holes
Step 3: Dig the Post Holes
Using a post hole digger, start digging holes for your fence posts. The holes should be deep enough to accommodate the length of the posts while also providing stability for the fence. Make sure the holes are evenly spaced along your fence line.
Step 4: Install the Fence Posts
Once you have dug all the post holes, it's time to install the fence posts. Place a post in each hole and fill it with concrete to secure it in place. Use a level to ensure that the posts are straight and upright. Allow the concrete to dry before moving on to the next step.
Step 5: Attach the Fencing Wire
After the fence posts are securely in place, it's time to attach the fencing wire. Start by unrolling the wire and securing it to one of the end posts using staples. Pull the wire taut and attach it to each post along the fence line. Use wire cutters to trim any excess wire at the end.
Step 6: Finishing Touches
Once the fencing wire is in place, take a step back and inspect your work. Make any necessary adjustments to ensure that the wire is secure and the fence line is straight. Add any additional staples or trim any excess wire as needed. Congratulations, you have successfully installed fencing wire around your property!
By following these six simple steps, you can easily install fencing wire around your property without the need for professional help. Not only will you save money by doing it yourself, but you will also gain a sense of pride and accomplishment from completing the project on your own. So grab your tools and get started on your DIY fencing wire installation today!